Share:

.svg)
.svg)
While providing API documentation and SDKs with your API makes developer onboarding faster, it can be a challenge to keep up when your API is constantly evolving. You need to manually publish the documentation or SDKs on every API update, which can be a time consuming and repetitive task, prone to delays in releases.
To cut down on time to market, you can integrate auto-generation of documentation and SDKs directly into your CI/CD pipelines or DevOps cycles. This helps automate API portal and SDK publishing so they are in sync with your API releases without any human intervention.
The APIMatic API is a popular automation option that can be integrated into your CI/CD pipelines seamlessly. You can set up GitHub Actions that are triggered on any update made to the API definition in your GitHub repo to update the published portal, and publish the SDKs automatically for the new API update. This results in instantaneous synchronization of the developer experience components for your API while making developers more productive, allowing them to focus on solving problems rather than repeating their tasks.
In this blog, I will take you through setting up a CI/CD process with GitHub Actions using the MessageMedia API to demonstrate the APIMatic API.
Step 1: Import an API into APIMatic and Publish Portal
Import the API into the APIMatic Dashboard by uploading the API definition file and publishing the portal with necessary customizations.
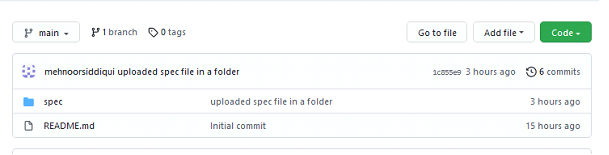
Step 2: Upload the API Definition to GitHub Repository
In a GitHub repository, upload the API definition file in a folder and name it spec. This contains the MessageMediaAPI.json file.
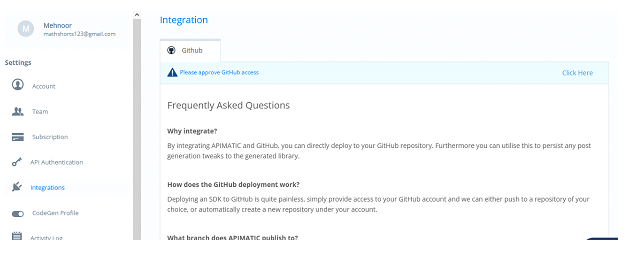
Step 3: Integrate APIMatic Account with GitHub
Next, you need to integrate APIMatic with GitHub to directly deploy the SDK to your GitHub repository.
Step 4: Create Secrets for the API
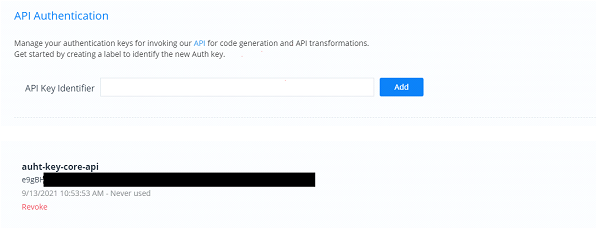
The imported API needs to be authorized. Both the authentication key and the API entity id (ID that uniquely identifies the API) should remain confidential. The authentication keys can be found in the settings of your APIMatic account. Create an authentication key by choosing a descriptive name for it and clicking the Add button.
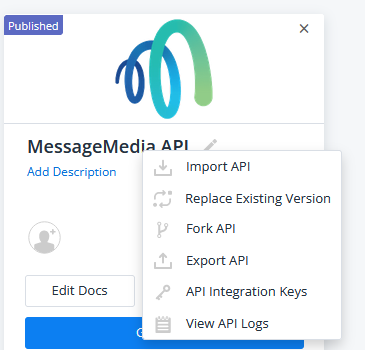
The API entity id can be found in the API integration key group shown below:
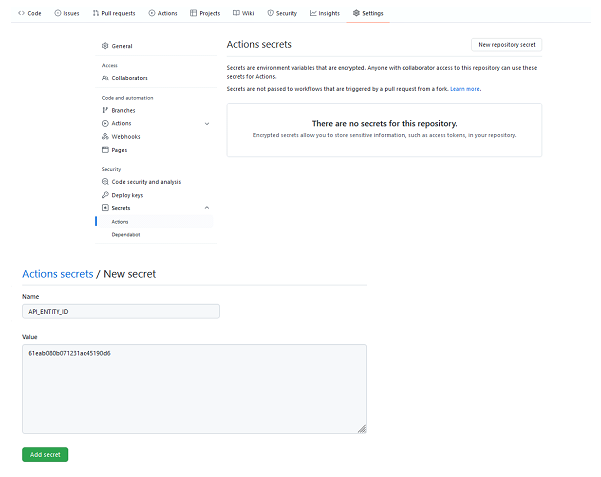
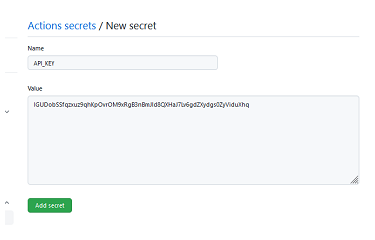
To create a secret, go to your GitHub repo and choose the Settings tab. Click Secrets > Actions on the left, and then choose New repository secret on the right panel. Create secrets for API_ENTITY_ID and API_KEY.
Step 5: Create Workflow to Automate API Portal and SDKs Publishing
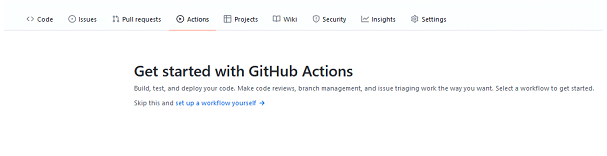
1. On your GitHub repository, create an action workflow file by first clicking on the Actions tab and then on Set up a workflow yourself to create the .github/workflow YAML file.
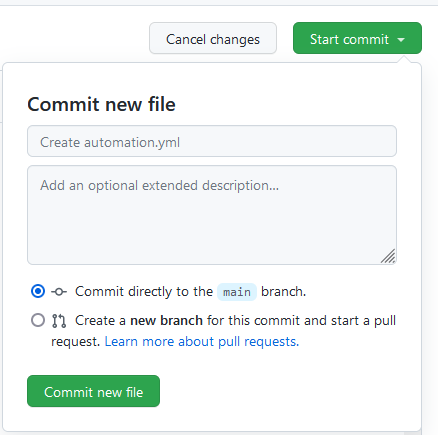
2. In the .github/workflows/ directory, create a new file called automation.yml and add the following code.
name: Update Portal
on:
  push:
    branches:
  	- master
	paths:
  	- 'spec/**'
  workflow_dispatch:

jobs:
  update-portal:
    runs-on: ubuntu-latest

    steps:
    -  name : checkout-repo
       uses: actions/checkout@v2
       with:
      	ref: 'master'
  	id: checkout-repo
This means that whenever you push the changes in the spec folder of the master branch, the workflow will trigger and workflow_dispatch allows you to trigger it manually as well.
    - name: install zip
  	run: sudo apt-get install zip unzip

    - name: zip files
  	run: zip -r portal-input.zip *
  	working-directory: spec

    - name: list
  	run: zip -sf portal-input.zip
  	working-directory: spec
Some of the configuration points in the automation.yml file along with their description are listed below:
- checkout-repo: To check out a repository so a workflow can access it.
- install zip: To install the zip command in the Ubuntu runner.
- zip files & list: To create the zip file named portal-input.zip of the spec folder.
- Inplace-import: To import the modified API definition in place of the old definition in the APIMatic Dashboard. The following code shows an example:
- name: inplace-import
  	run: >-
    	curl -X PUT
    	--url 'https://www.apimatic.io/api/api-entities/$'
   	--header 'Authorization:X-Auth-Key $'
   	--header 'Accept:application/json'
-o entity.json- Fetch generate sdk id: Use the endpoint to generate the SDK (.NET) and save the response to data.json.
   - name: Fetch generate sdk id
  	run: >-
   	curl -X POST
   	--url 'https://www.apimatic.io/api/api-entities/$'
    	-H 'accept: application/json, text/plain, */*'
    	-H 'content-type: application/json;charset=UTF-8'
    	--data-raw '{"apiKey":"$","encryptedId":"$","template":"CS_NET_STANDARD_LIB","repoName":"your-GitHub-repo-name","branchName":"CodeGen-CS","downloadId":"/api/api-entities/$/code-generations/$/generated-sdk","commitMessage":"spec updated","accountName":"youGithubaccountname"}'
    	--compressed
Testing the GitHub Action
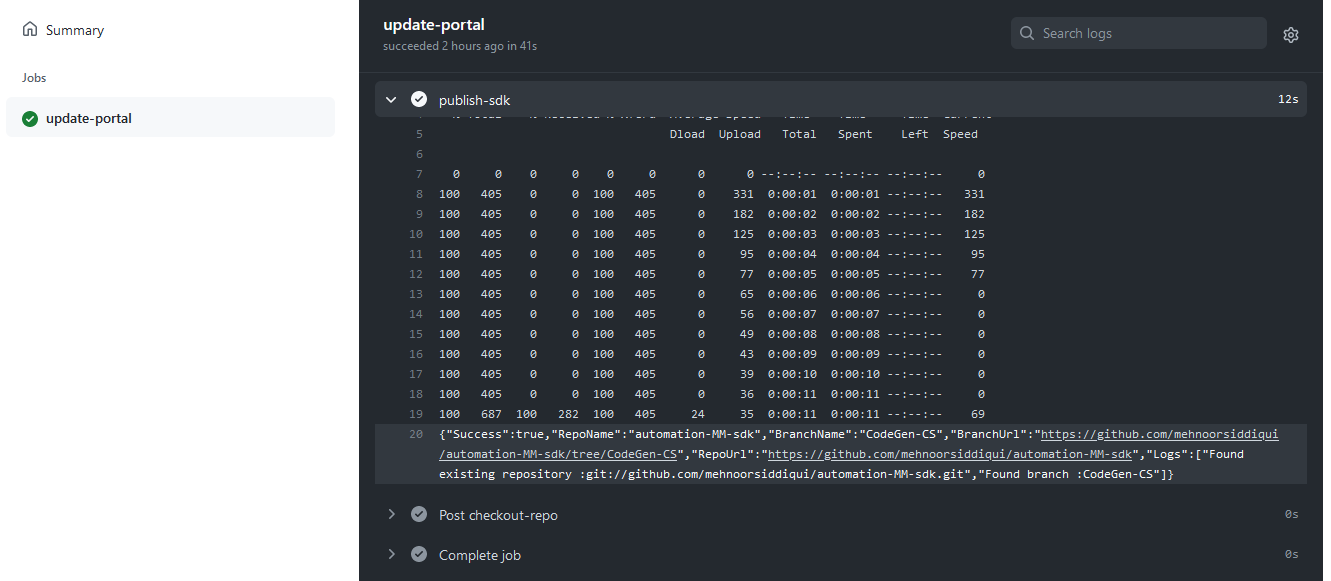
Once you have created the workflow, it is time to test how you can automate API portal and SDK publishing in your DevOps cycle. Commit the YAML file and make some changes in the API specification file (MessageMedia.json) that will trigger the workflow described.
You can see the status of the workflow as shown below:
Wrapping it up!
Through automation, developers spend more time improving their own API while the APIMatic API helps them get done through the boring and monotonous tasks. Likewise, GitHub Actions are definitely useful in streamlining your CI/CD pipelines and DevOps cycles and can be really helpful for those maintaining API definitions on GitHub. Check out more on how APIMatic supports automation for your developer experience!