By combining APIMatic’s high-quality idiomatic SDKs with the Backstage developer portal, you can create a compelling and differentiated developer experience. 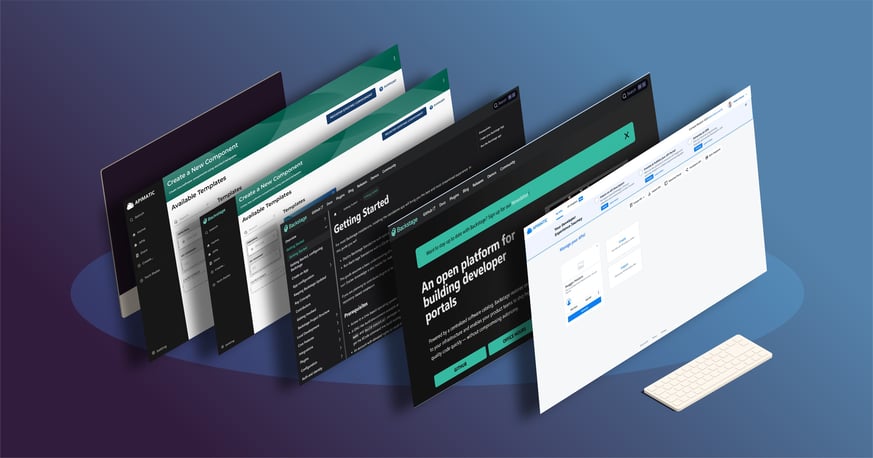
What is Backstage?
Backstage is an open-source platform developed by Spotify for managing the entire lifecycle of developer infrastructure, including services, APIs, documentation, and more. Backstage streamlines the development process through its centralized and customizable platform, offering a unified dashboard that consolidates information on projects, services, and infrastructure. Acting as a service catalog enhances transparency by allowing teams to document and discover internal services easily. Backstage's extensible architecture supports a robust plugin ecosystem, enabling teams to tailor the platform to their specific workflows and preferences. The platform promotes collaboration, accelerates onboarding through standardized documentation, and integrates seamlessly with various DevOps tools.
Extending Backstage with SDKs
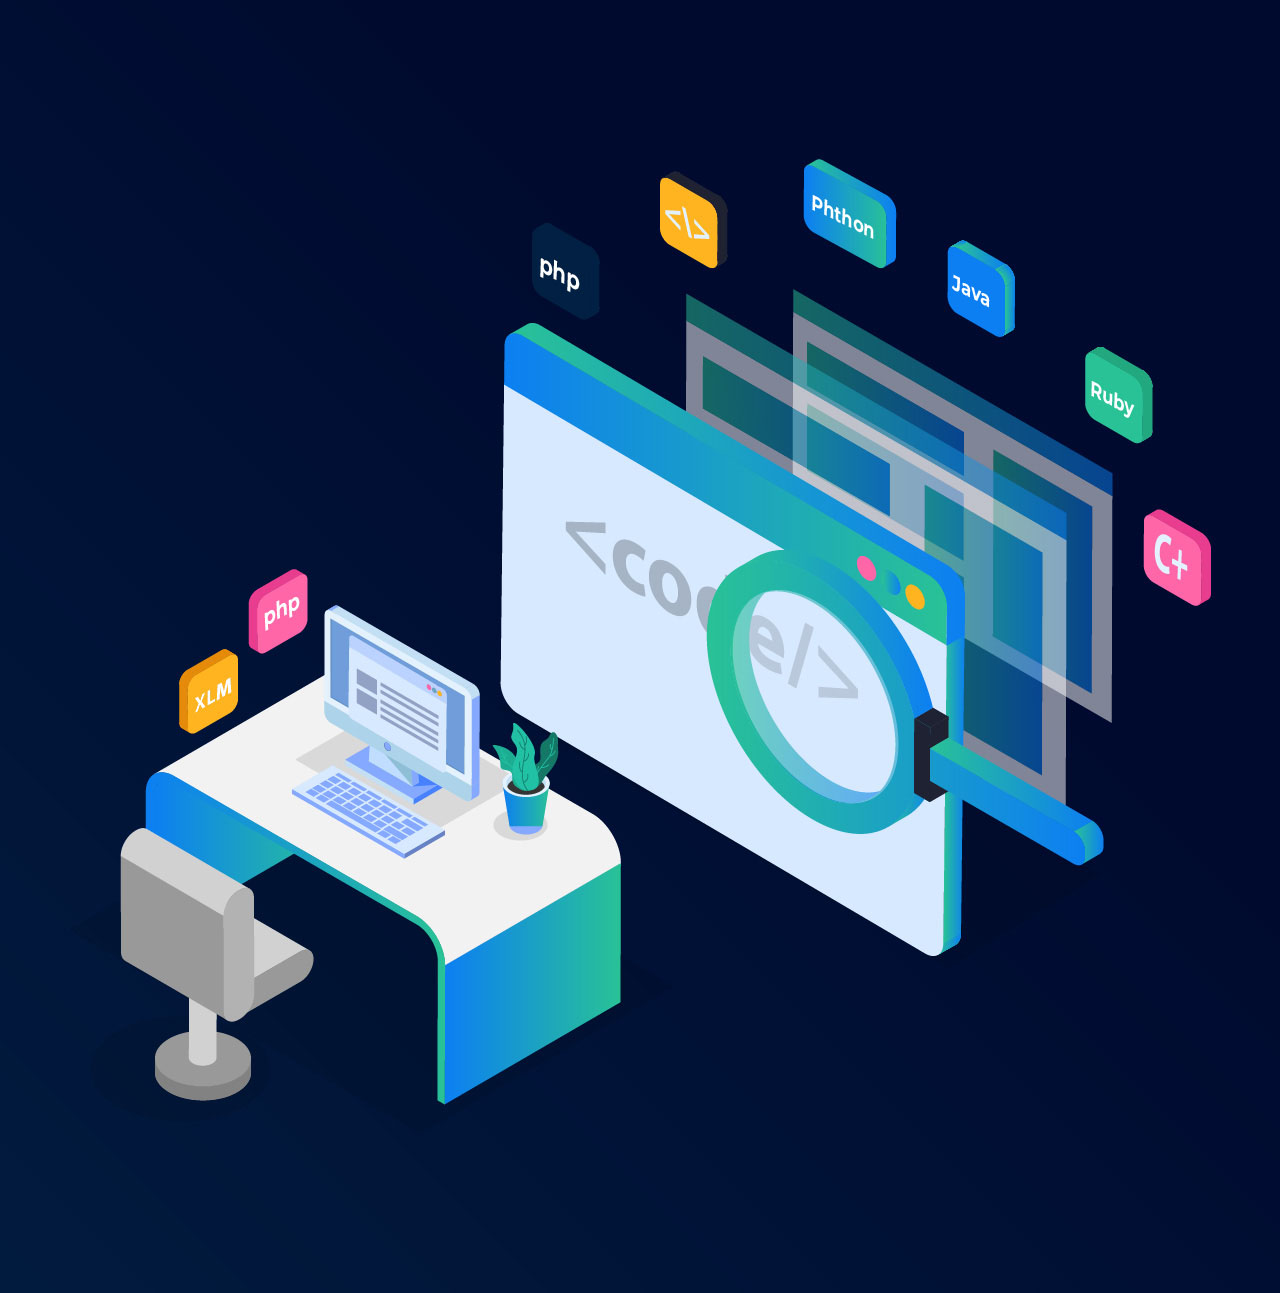
As the number of services and API complexity grows, teams using Backstage as their developer portal may look to add SDKs to support developers in multiple languages. SDKs include code libraries, documentation, getting-started guides, and code samples, empowering developers to interact seamlessly with APIs and services.
APIMatic automates the creation and maintenance of SDKs in various programming languages. In this tutorial, we’ll show you how to take your API developer experience to the next level by using APIMatic to generate SDKs and incorporate them into your Backstage portal.
APIMatic goes above and beyond to ensure a good developer experience by not only providing auto-generated SDKs in the programming languages you need but also includes SDK documentation with guided walkthroughs, code samples, and getting started guides.
We can integrate APIMatic SDKs by incorporating them into a dedicated SDKs page within existing documentation or by embedding the SDKs documentation as a newly registered component in the Backstage portal. In the upcoming sections, we will explore both options to see how they can improve the developer experience within the backstage portal.
Have a look at the final result.
Generate SDKs and Documentation with APIMatic
In this section, we walk through publishing an API portal for APIMatic SDKs. If you already have a generated portal with APIMatic, skip to Integrate APIMatic with Backstage section.
Start your free trial with access to all SDK generation features.

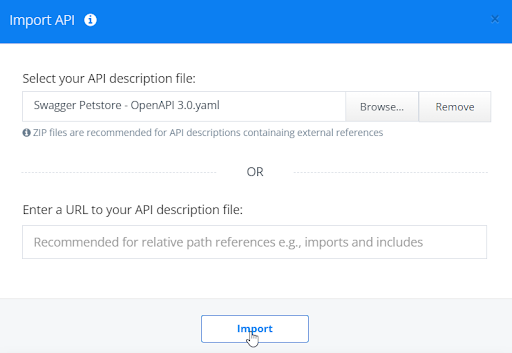
Import an API definition
Follow these instructions to import your existing API definition or use the example Petstore API.
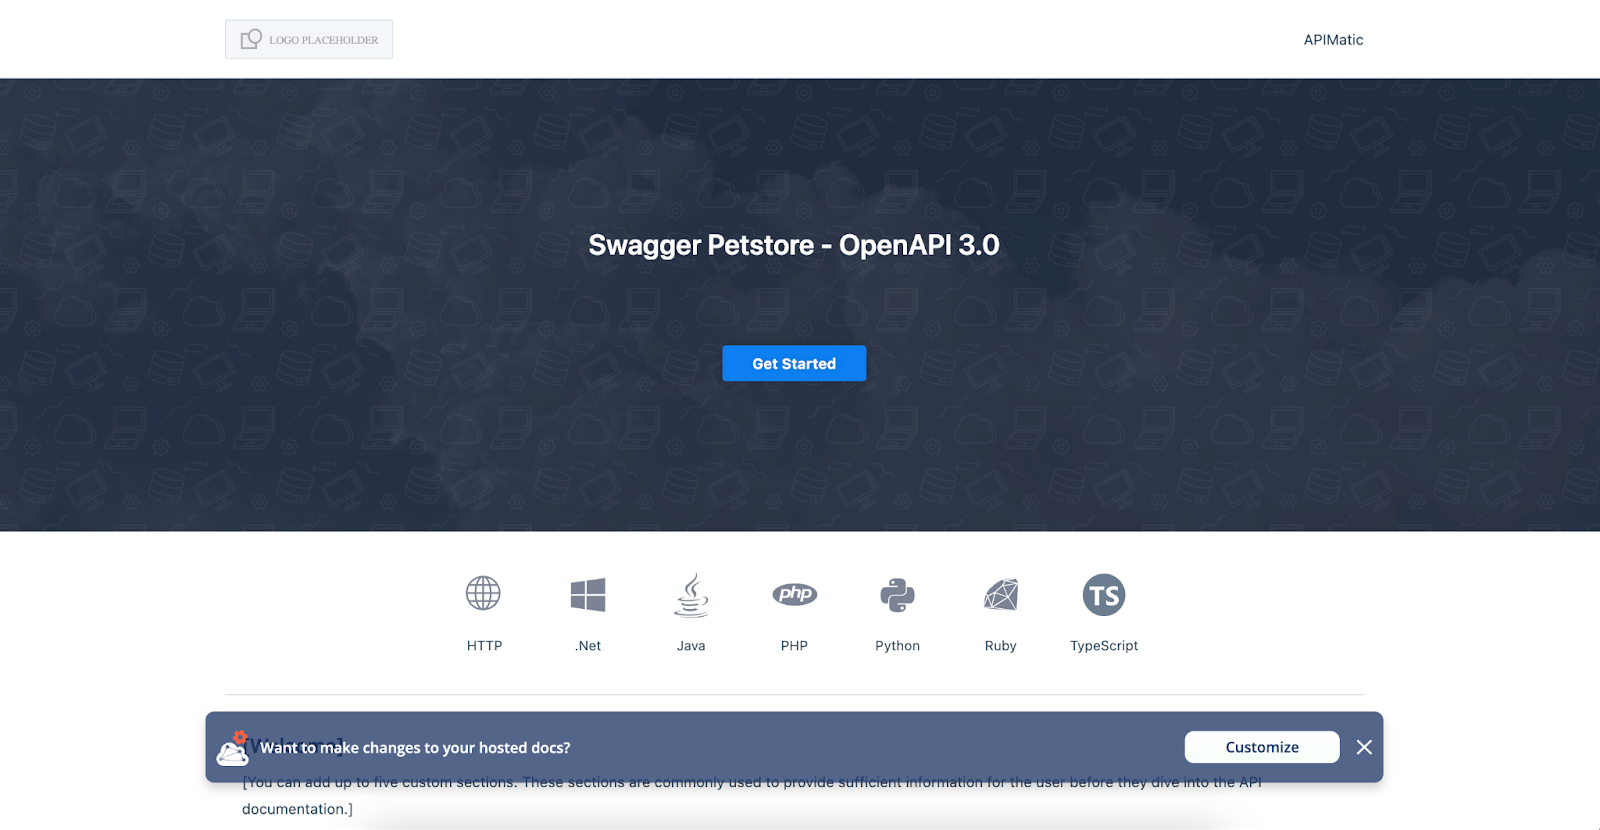
Generate SDK Portal
Follow these instructions to generate a portal for your SDKs using the API definition you just imported. In the last step, you’ll click “Preview API Portal”. A preview of the default landing page of your portal opens up in a new tab on your browser. From here onwards, you can customize your portal's look, feel, and behavior or publish it.
Publish SDK Portal
Click the Publish Portal button at the bottom of the page and follow these instructions to publish a hosted portal.
Once publishing is complete, visit your unique URL to view your SDK documentation. You can also find the URL in the portal Settings > Publishing section of the portal editor.
Integrate APIMatic with Backstage
Note: This guide assumes you already have an API Documentation portal with Backstage. For more details, visit their site.
Create a custom page for SDKs
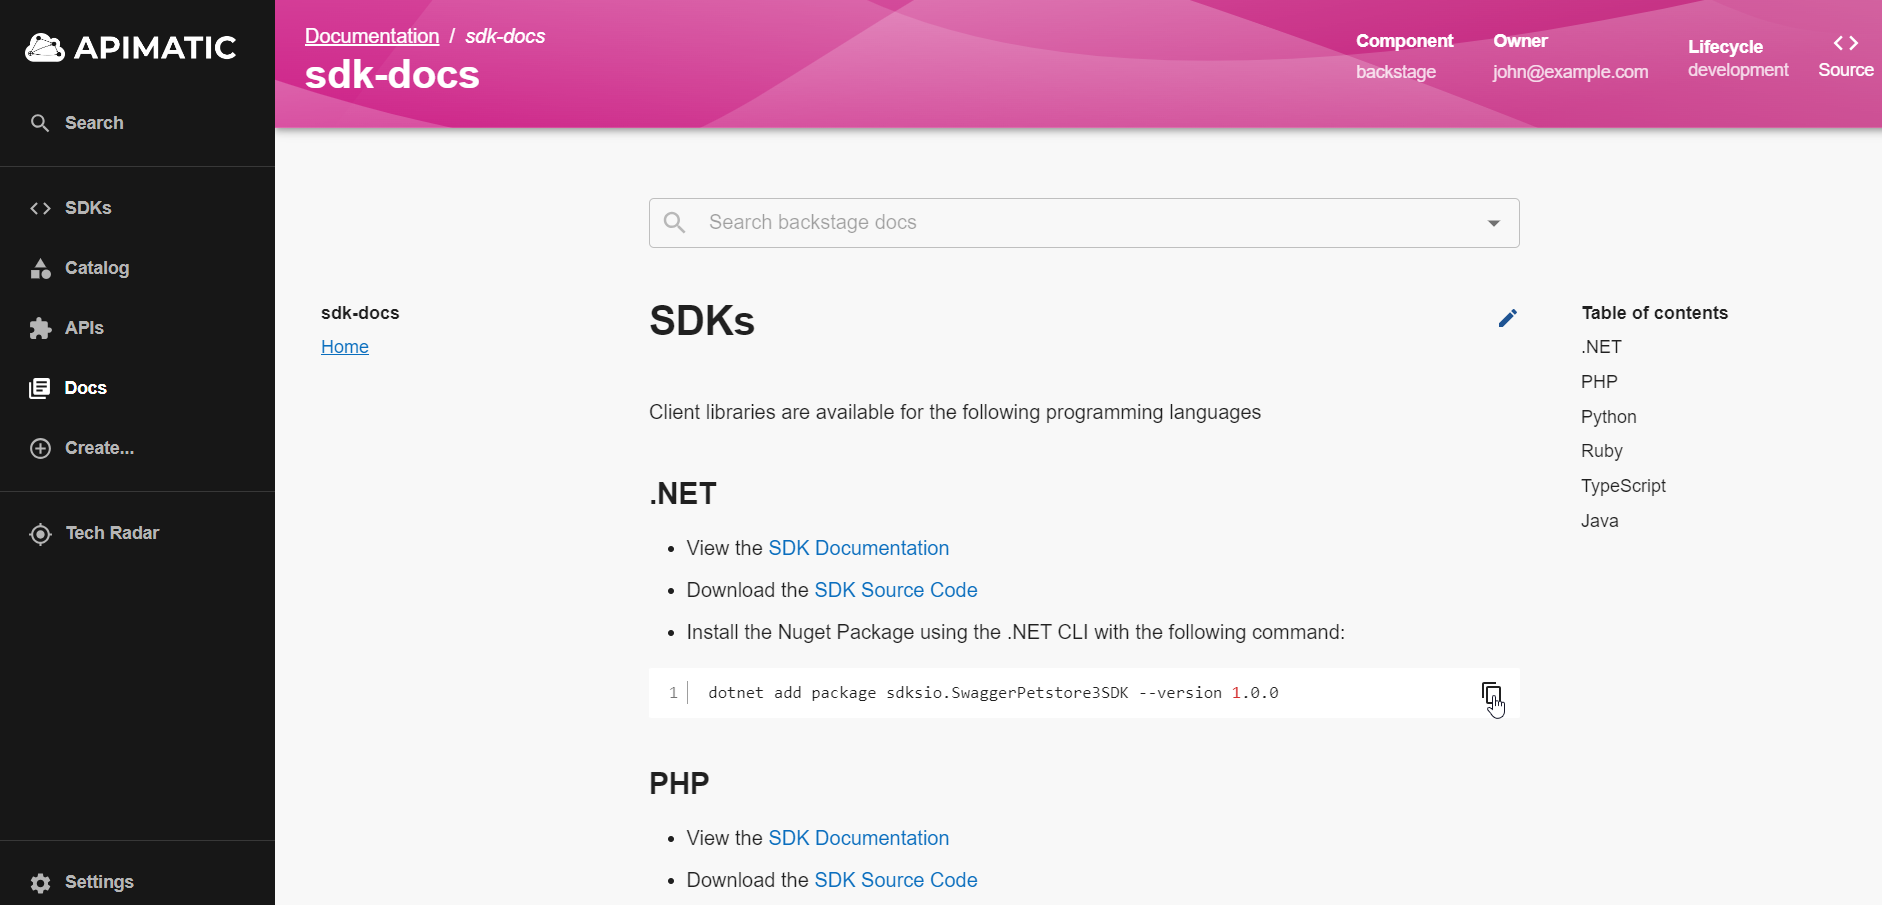
When completed, your Backstage developer portal will include a custom SDK page.
After setting up the Backstage platform by following their getting started guide you’ll see your instance running at http://localhost:3000/. Before running the application, ensure that the tech docs configuration section in app-config.yaml is configured to run locally.
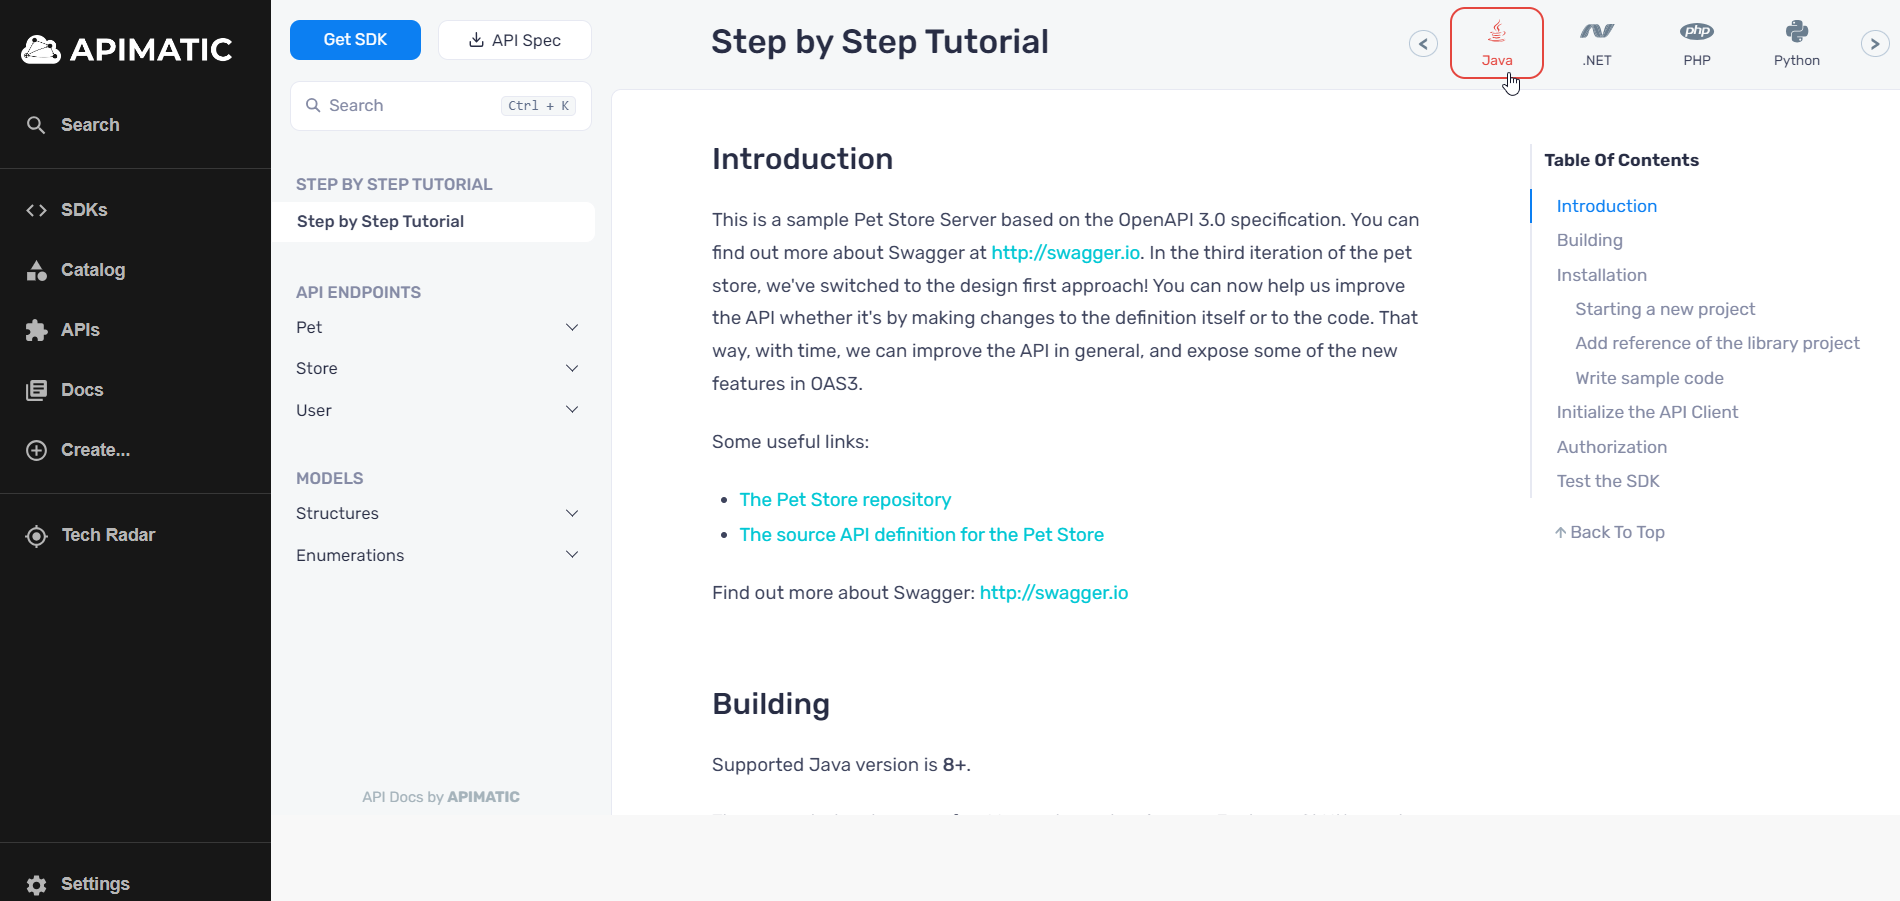
The first step is to create a customized page in the Backstage platform. The page will include a list of all the supported language SDKs and links to setup instructions.
- For an overview on the docs-like code solution provided by Backstage, which is responsible for rendering documentation via markdown files, consult the TechDocs documentation.
- Create a markdown file in your application’s doc folder, which you’ll find at <root folder/docs>, and provide a descriptive name <doc name>.md.
- We’ve created a markdown template. Copy the markdown from here and paste it into your markdown file. Note the text is for our Petstore example, so you can customize the text for your API. You must replace the YOUR_DOCS_SLUG and YOUR_API_KEY placeholders with the actual values for your SDK documentation. Detailed instructions are below.
- YOUR_URL_SLUG represents the slug you defined when publishing your APIMatic Portal. To locate this value, hover over the top left corner of your API definition tile in the APIMatic Dashboard and copy the link. You will just need the subdomain of this URL e.g. https://YOUR_DOCS_SLUG.apimatic.dev. Replace all instances of YOUR_DOCS_SLUG with this value.
- YOUR_API_KEY represents a unique identifier for your SDK documentation. To access the API Key for your SDK documentation, click the kebab menu (three vertical dots) on the API definition tile to retrieve the API integration key.
- From the context menu, select ‘API Integration Keys’.
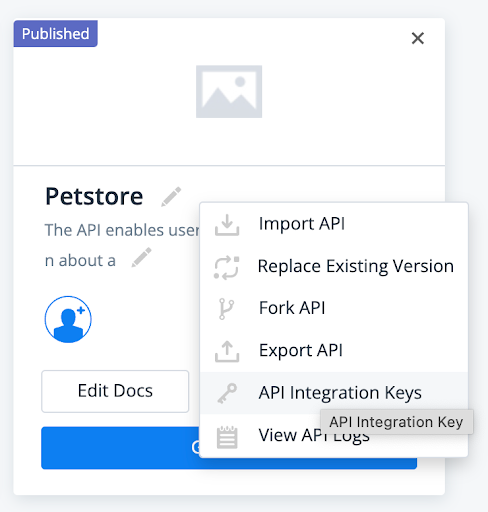
- Copy the property titled API KEY. In the markdown template, replace all instances of YOUR_API_KEY with this value.
This concludes your setup for this custom page. Your new page lists all your SDKs. You can save your changes and proceed to the next step.
Create a link to the custom SDK page
1. Create a mkdocs.yaml file in your application’s root folder and change it to reference the markdown document in the navigation bar.
2. After running the application successfully, select Create from the navigation bar and press the REGISTER AN EXISTING COMPONENT button.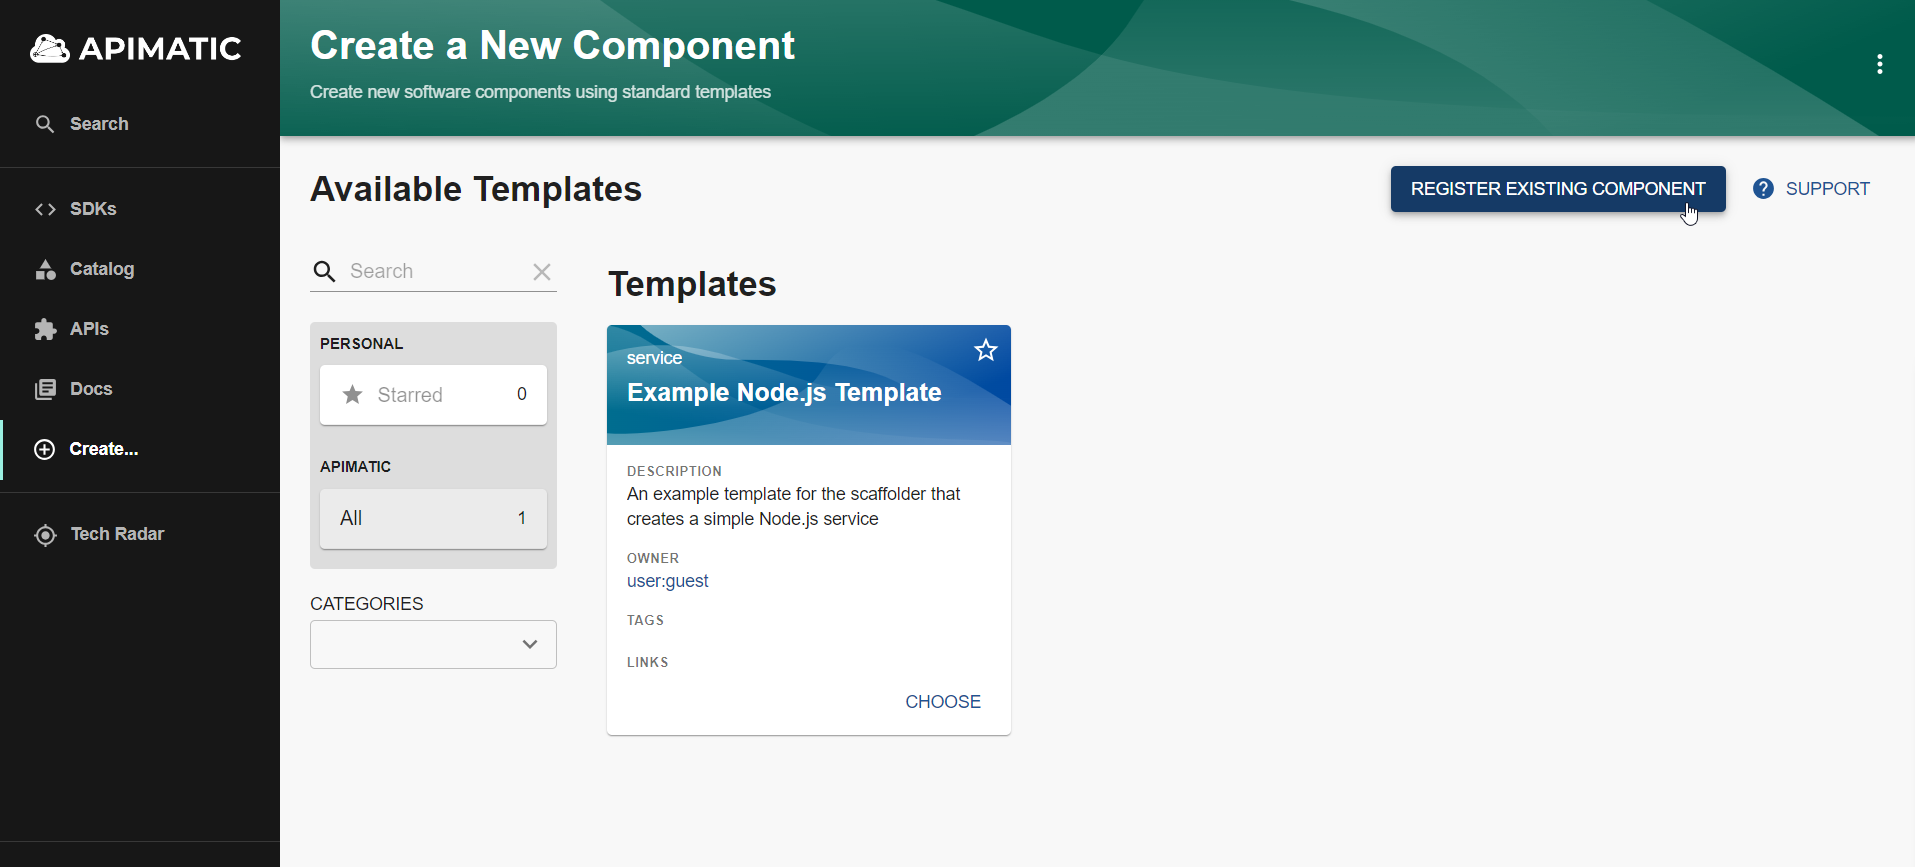
3. Import the catalog-info.yaml file and analyze it on the next page. The catalog-info.yaml file analysis will reveal any problems. Please take care of them before proceeding. You can read more about it here.
4. Provided the previous steps executed smoothly, you will see the VIEW THE COMPONENT button. Pressing this button takes you to a page with the newly created component details. Click on the DOCS tab to view the linked SDK documentation.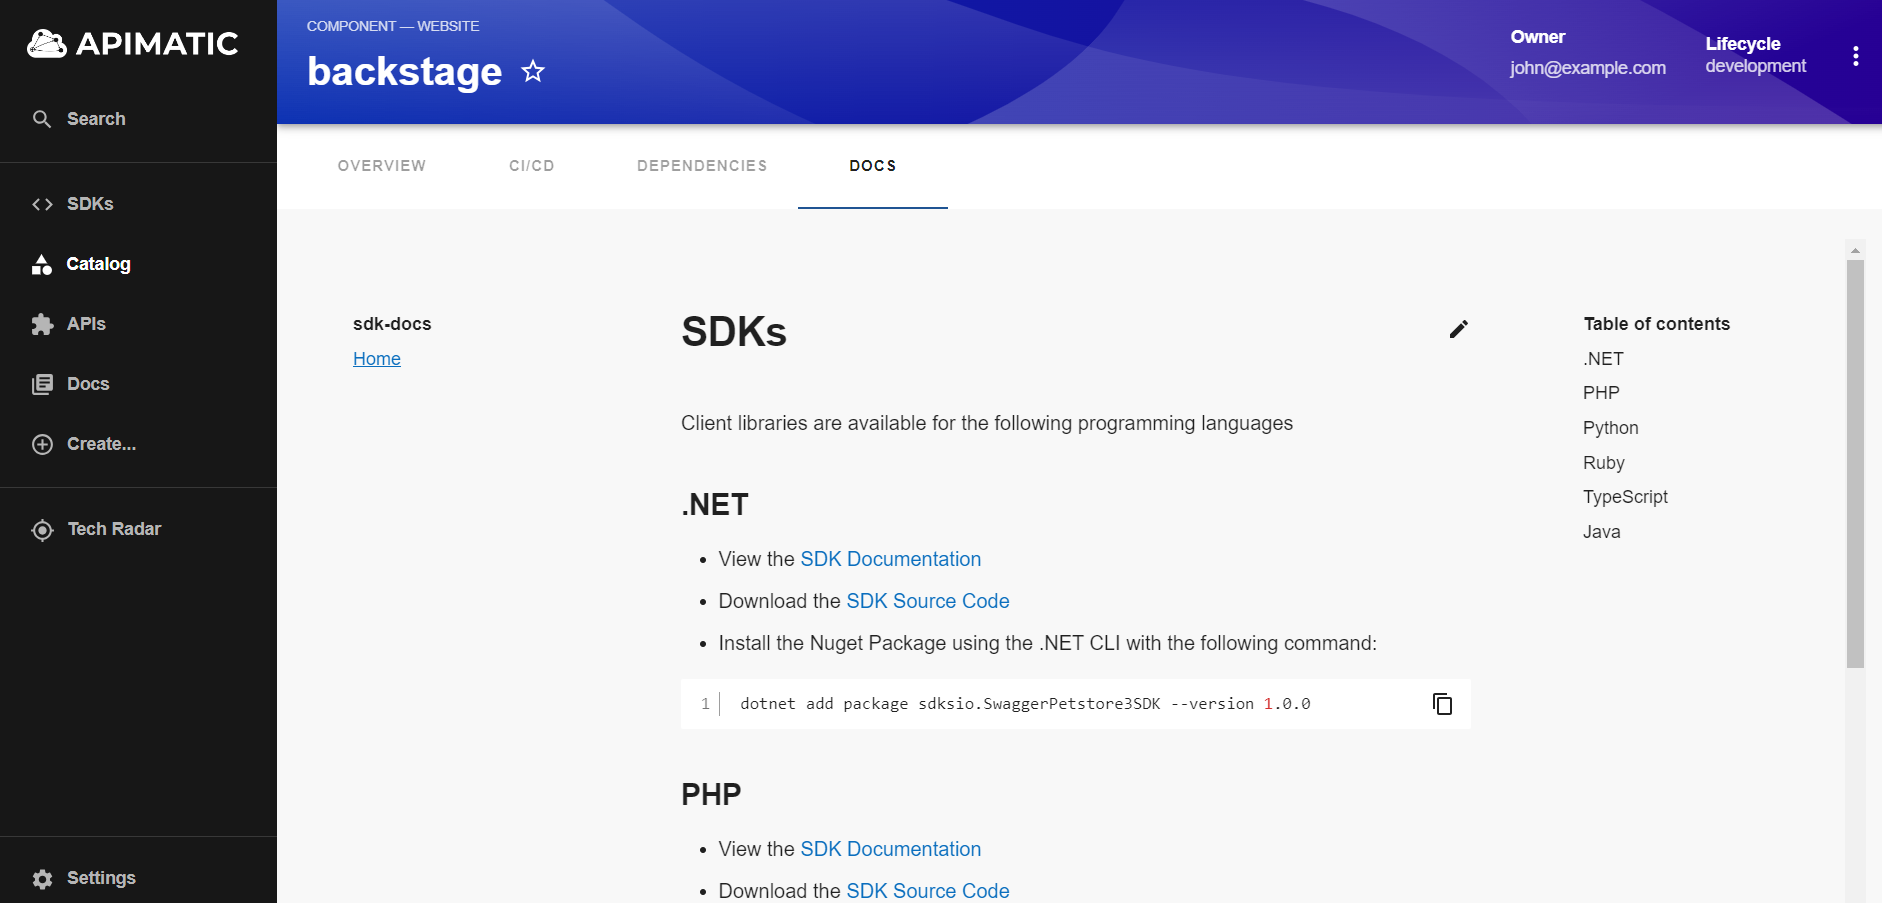
Embed APIMatic’s SDK Documentation in Backstage (Optional)
This section is optional because your SDK documentation is already published and publicly accessible; embedding it in your Backstage portal is a nice touch but not a requirement.
In the previous section, we created a page that redirects to the SDK documentation hosted by APIMatic. We can go further and embed the SDK documentation inside a Backstage portal, and it would look like the following.
Generate an APIMatic embed script
APIMatic’s SDK Documentation can be embedded in any web page via an embeddable script. To generate the embed script for your APIMatic docs:
- Navigate to the APIMatic dashboard.
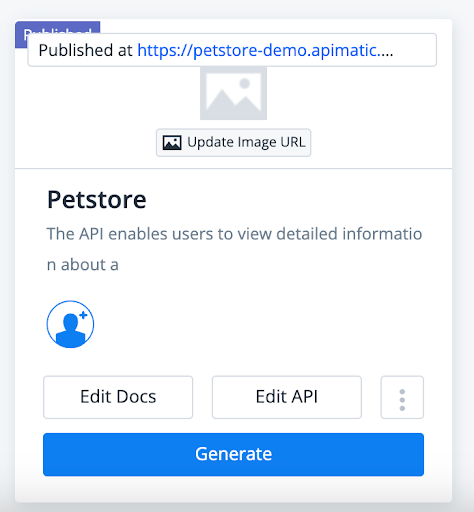
- Locate your API definition tile.
- Click Edit Docs to navigate to the Portal Editor.
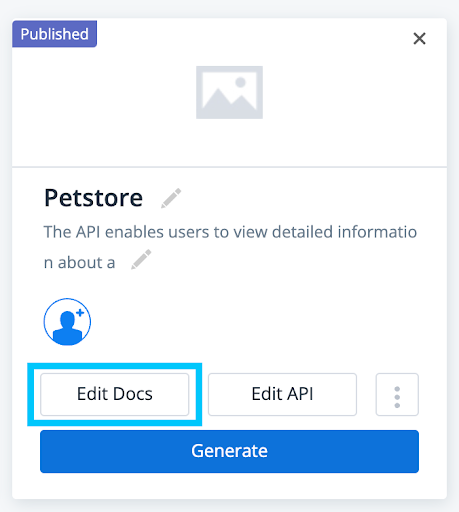
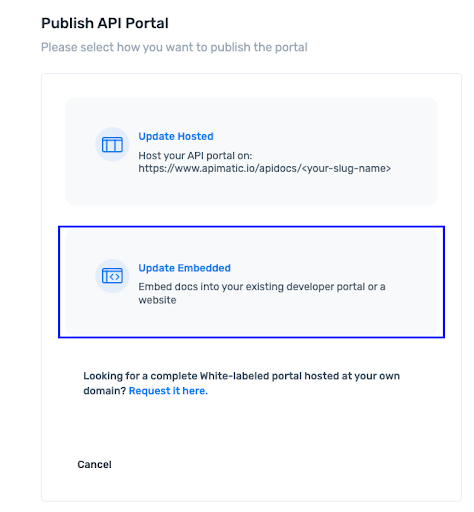
- In the top left corner of the Portal Editor, click the ‘Publish Portal’ button.
- Choose the Update Embedded option on the next screen.
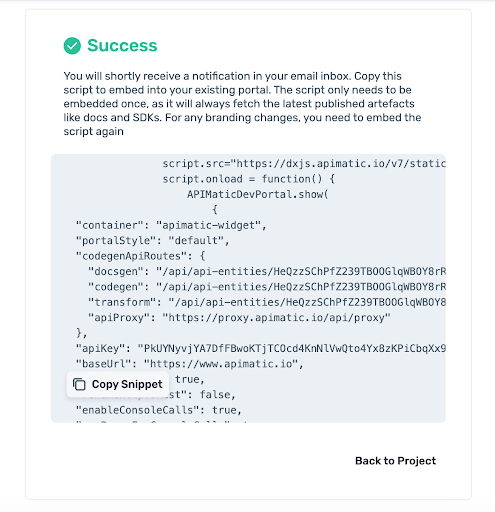
- Select the API version you want to generate the embed script for and click Generate Script.
- You will be presented with a snippet containing the script. You need to copy this entire script to use in the next section.
Add Embed Script to Backstage Portal
In the previous steps, we used APIMatic to create an embed script. Now include it in the Backstage portal.
First, we’ll create a customized page called SDKs that is accessible from the portal's landing page. This new page displays our embedded portal links to the SDKs.
To achieve this please follow the instructions given in the Backstage official documentation of customizing the home page.
1. We are modifying the default behavior of the application’s home page to link the SDK documentation. Create a new file HomePage.tsx. This is where our new homepage component will live. It will look like the following:
2. Now create a component with the name ApimaticWidget.tsx in the components folder of the Backstage application apps folder. This component will load the embedded portal by calling the initializeWidget method. The method uses the script copied earlier in the previous section.
3. To make the portal accessible through an engaging information card, we will create another component with the name InformationCard.tsx.
4. Finally, let's add the routes to the ApimaticWidget component in App.tsx to make the customized SDK page accessible from the navigation bar.
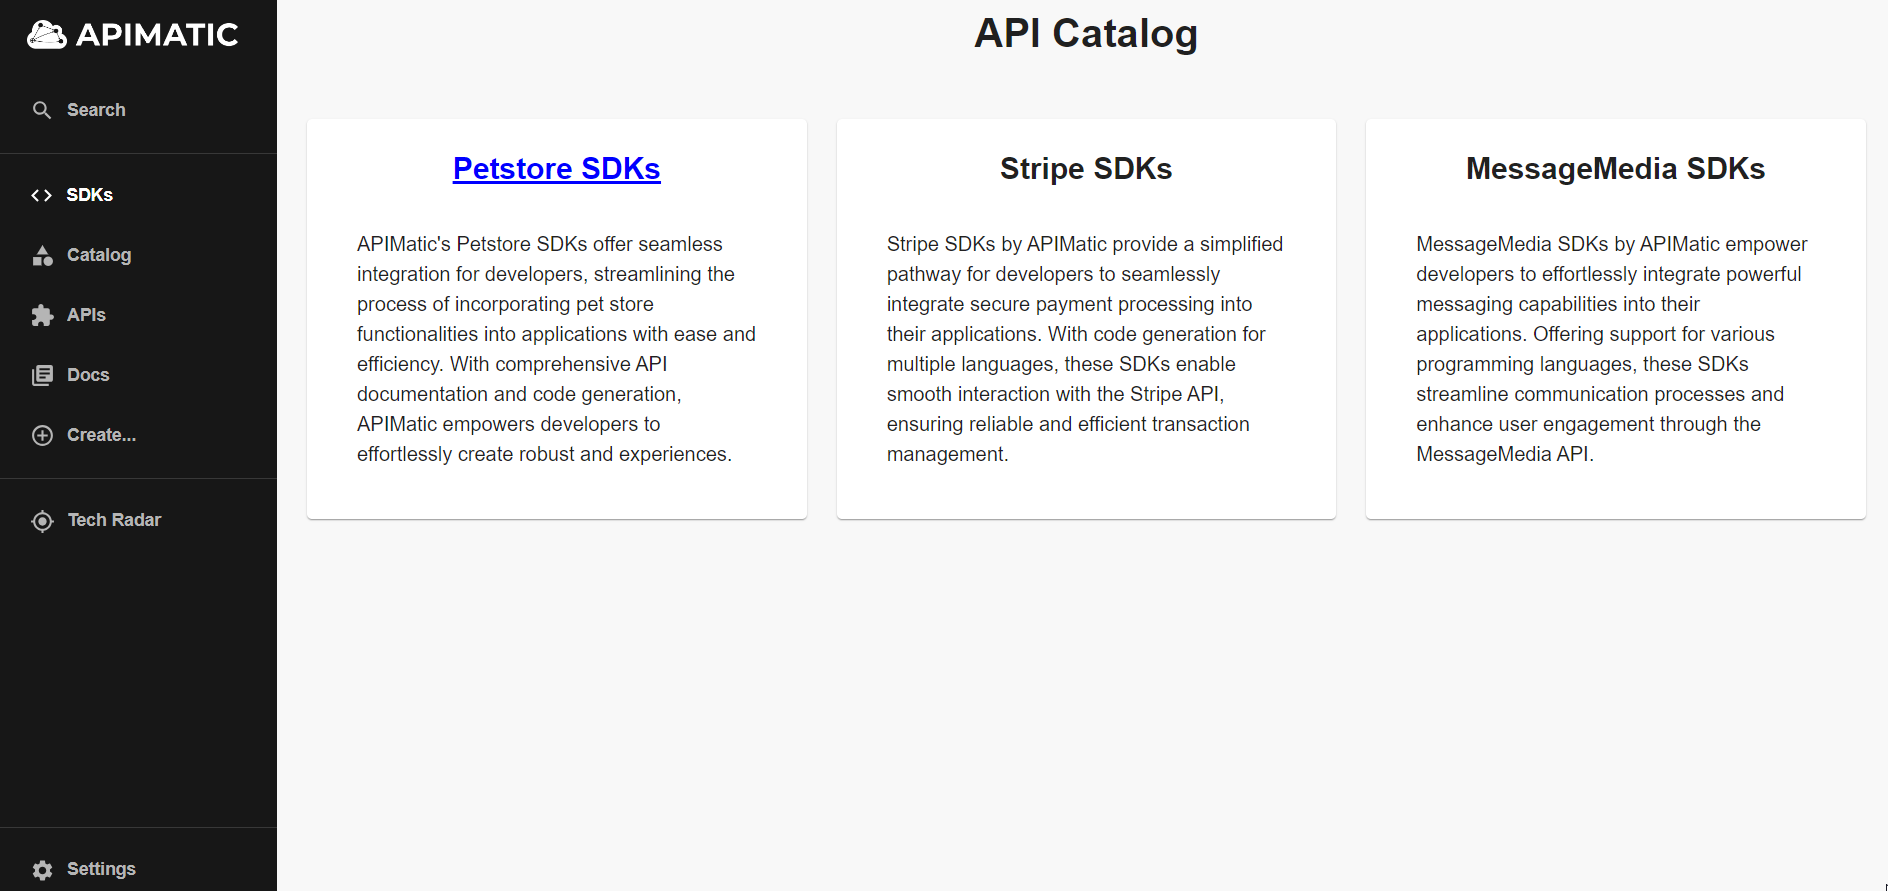
Now we have achieved an interactive and convenient way of making the SDKs even more accessible for the developers.
Clicking on Petstore SDKs takes us right to an embedded APIMatic Portal without leaving our Backstage developer portal.
What’s Next?
In the ever-changing landscape of API-driven development, combining Backstage's API management capabilities with APIMatic's automated SDK generation makes it easy for organizations to establish a strong foundation for API development and consumption.
If you liked what you saw in this blog, sign up for APIMatic and get started! We would love to see what you build with APIMatic. Tweet your updated Backstage Portals to us at @APIMatic or drop a mention on Linkedin.