Share:

.svg)
.svg)
Docs as code is a documentation strategy that treats documentation exactly like code. This includes using the same tools and processes to publish documentation that is used to write code, bringing elements like Version Control, CI/CD, and branching into the documentation realm.
For a more in-depth look at the benefits of this approach, check out this blog on how Docs as Code can improve your API Documentation process.
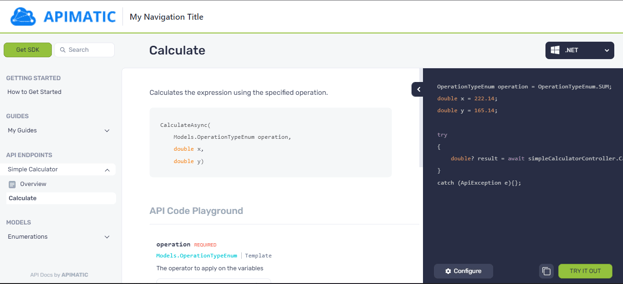
APIMatic wholeheartedly embraces the “docs as code” philosophy, allowing you to specify all aspects of your API documentation as code. Using this approach, APIMatic users are able to generate API Portals containing:
- Comprehensive API reference documentation
- Programming Language-specific API documentation
- Language-idiomatic SDKs along with code samples
- Custom Markdown guides
In this blog, I will take you through the process to generate an API Portal using APIMatic’s docs as code offering and demonstrate how it can be automated using GitHub Actions.
Step 1: Download the GitHub Repository in a ZIP File
Download the sample GitHub repository in a zip file using the Download ZIP option. This file generates an API Portal using APIMatic’s API.

Here is a brief description of what the repository includes:
Content Directory
The content directory contains:
- Custom Markdown guides written in GitHub-flavoured Markdown. You are free to include any information relevant to your product here, including product documentation, changelogs, and step-by-step tutorials.
- Custom table-of-content as the content\toc.yml file. This allows you to create a content hierarchy displayed in the navigation sidebar.
Here is what a sample toc.yml file looks like:
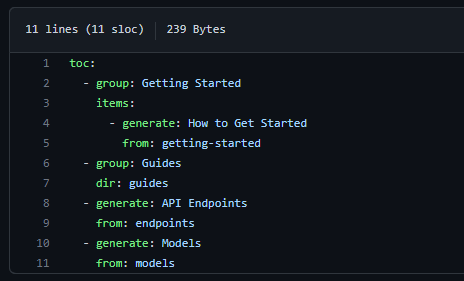
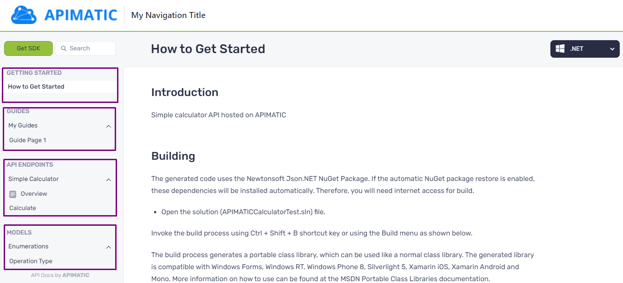
This is how the sample toc.yml file looks like in the corresponding navigation bar in the generated Portal.
Providing custom content is optional. For further details, refer to the Custom Content Documentation.
Spec Directory
The spec directory contains:
- An OpenAPI specification file.
Here are some considerations for API specification files in this directory:
- The API specification must be in one of the formats supported by APIMatic.
- The API specification format is detected automatically by APIMatic.
- You can include multiple API Specification files here if you want them all documented in the same API Portal and APIMatic will merge them for you, even if they are in different specification formats.
If you want to merge multiple API specification files, refer to the API specification documentation for additional handling.
Static Directory
The static directory contains any static content which can be referenced in the documentation including:
- Images
- Logos
- PDFs
Providing static content is optional.
Build File
The name of the build configuration file ends with APIMATIC-BUILD.json and should be placed in the root directory. You can customize the generated API Portal by specifying properties such as:
- Which SDKs to generate and include within the Portal.
- Package information for the SDKs to be included in the documentation.
- Page title and logo image for the Portal.
- Portal color theme and typography.
- Custom CSS.
A minimal build file would look like this:
{
  "$schema": "https://titan.apimatic.io/api/build/schema",
  "buildFileVersion": "1",
  "generatePortal": {
     "apiSpecs": [
      "spec1",
      "spec2"
    ],
    "languageConfig": {
      "http": {}
    }
  }
}
For more details, take a look at APIMatic Build File documentation.
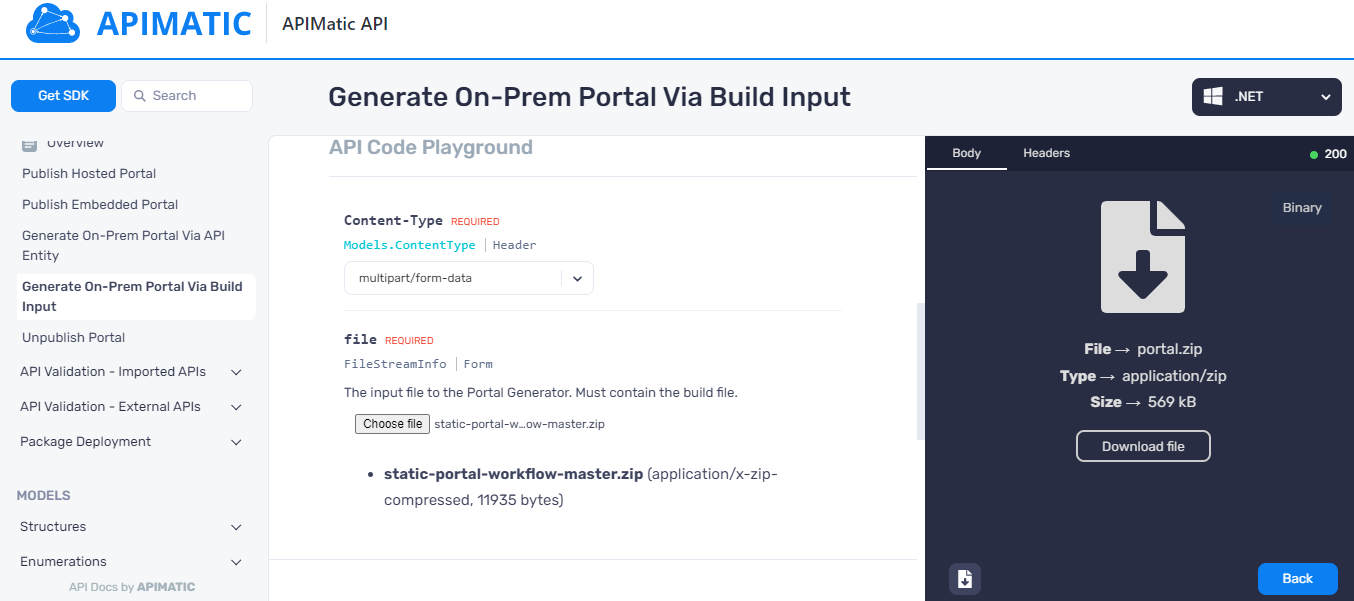
Step 2: Generate The API Portal
Using the APIMatic API, provide the zipped repo contents to the Generate On-Prem Portal via Build Input endpoint. This endpoint generates an API Portal in the form of a static website. To host the website, do not run the index.html file directly rather use http-server to run it locally.
Step 3: Host the Static API Portal on any Web Server
The previous step returns a zip file containing artifacts for a static website that can be hosted on any web server. To quickly preview the generated Portal, you can use http-server or similar tools to run the static website locally.
To visualize the above process, you can also watch the video on how to create an API Developer Portal via the Docs as Code Workflow.
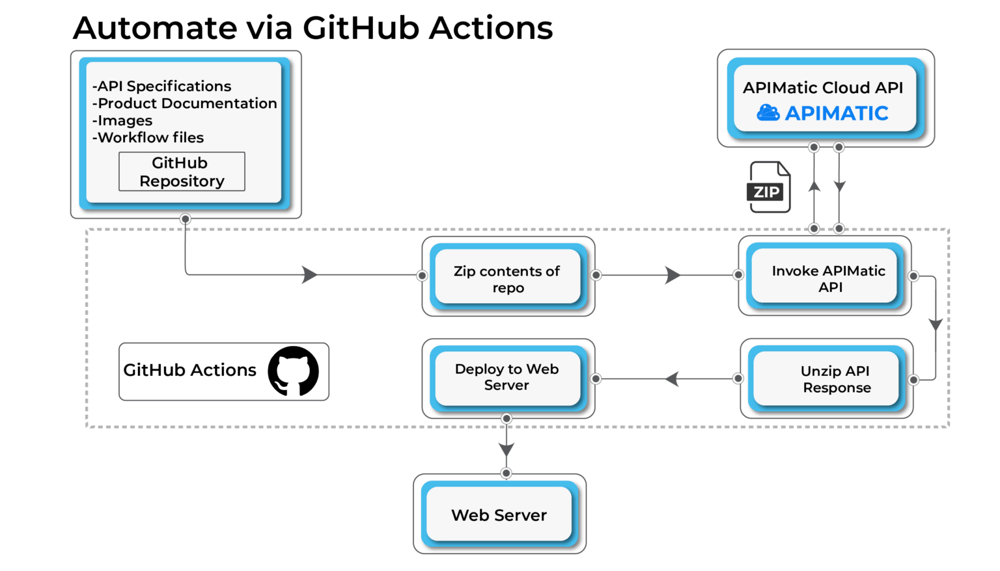
Automate the Docs as Code Process via GitHub Actions
The entire docs as code workflow can be automated using GitHub Actions. Whenever a change is pushed to the GitHub repository, the contents of the repository are zipped and sent to the Portal Generation Endpoint. The response received from this endpoint contains the Portal artifacts that are deployed to the server.
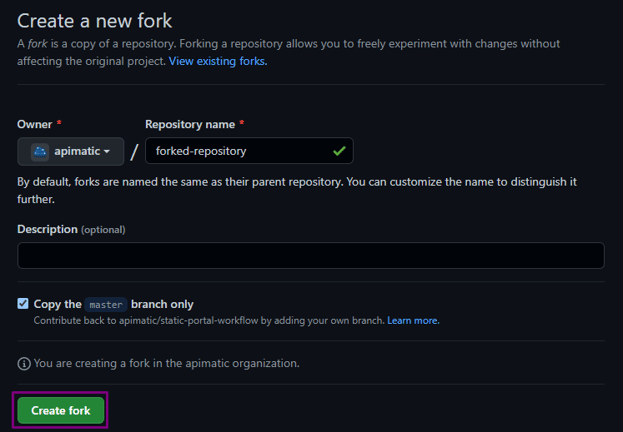
Step 1: Fork the GitHub Repository
To fork the sample GitHub repository, click on Fork in the top-right corner. Select an Owner and provide the Repository name. By default, forks are named the same as their parent repositories. Optionally add a Description and click on Create Fork.
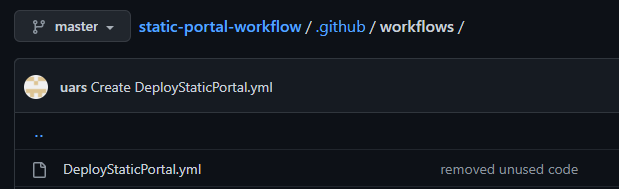
The forked repository contains a sample workflow file, DeployStaticPortal.yml, in the .github/workflows directory. This contains the steps to build the API portal from the GitHub repo contents.
Step 2: Review the Workflow File
A GitHub Actions workflow is an automated process that runs one or more jobs. Workflows are defined in YAML files, added to the .github/workflows directory, and contain a set of tasks to be performed.
For example, I created a job in the DeployStaticPortal.yml file that generates an API Portal using the APIMatic API and deploys it to Netlify. (You can deploy to other platforms such as Cloudflare Pages or Azure Static Web Apps as well)
This workflow file includes the following steps:
- Check out the repository
- Zip the contents of the repository
- Call APIMatic’s Portal Generation API
- Download and unzip the response received from the APIMatic API
- Deploy the generated Portal to Netlify
name: Deploy Static Portal
on:
workflow_dispatch:
push:
branches:
- master
jobs:
generate-portal:
runs-on: ubuntu-latest
steps:
- uses: actions/checkout@v1
name : checkout-repo
id: checkout-repo
- name: Zip files
run: zip -qq -r portal-input.zip .
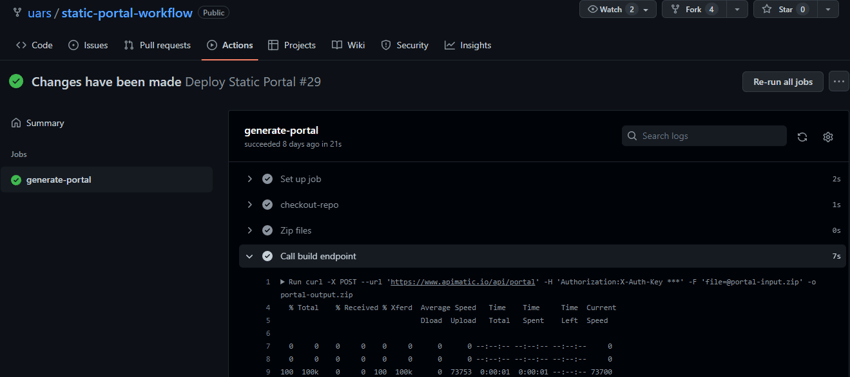
- name: Call build endpoint
run: curl -X POST --url 'https://www.apimatic.io/api/portal' -H 'Authorization:X-Auth-Key $' -F 'file=@portal-input.zip' -o portal-output.zip
- name: list
run: ls
- name: Extract generated Portal
run: unzip -qq portal-output.zip -d static-portal
- name: Deploy to Netlify
uses: nwtgck/actions-netlify@v1.2
with:
publish-dir: './static-portal'
production-branch: master
github-token: $
deploy-message: "Deploy from GitHub Actions"
enable-pull-request-comment: false
enable-commit-comment: true
overwrites-pull-request-comment: true
env:
NETLIFY_AUTH_TOKEN: $
NETLIFY_SITE_ID: $
timeout-minutes: 1
Step 3: Create Repository Secrets
The forked repository does not copy the secrets maintained in the parent repository. To create a secret, go to your GitHub repo and choose the Settings tab. Click Secrets > Actions on the bottom left, and then choose New repository secret on the right panel.
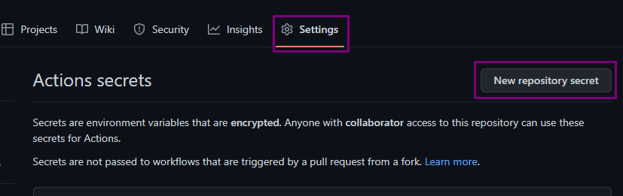
You will need to create the following secrets to run this workflow:
- API_KEY for the APIMatic API Authentication Key.
- NETLIFY_AUTH_TOKEN for the Netlify API Key, the auth token created using Netlify.
- NETLIFY_SITE_ID for the SiteID of the website created through Netlify.
Using Netlify is optional. You can use other platforms for deploying as well.
Step 4: Test the GitHub Action and Deploy to Server
The GitHub Action will be triggered when any commit is pushed to the master branch of your repository. Alternatively, you can also trigger the workflow manually. As soon as the workflow run completes, you should be able to view the updated Portal on Netlify.
Wrapping it Up
APIMatic provides easy docs as code workflow that allows you to manage your API Portal as code and automate deployments via GitHub Actions. Check out how APIMatic can help you automatically create better SDKs and SDK documentation with minimal effort. For free access to the Docs as Code API, please drop an email to support@apimatic.io.